Dating App Selfie Tips: How to Take Great Dating Photos at Home


 Trusted by 10,000+ daters

You need better dating photos. You know this. But hiring a photographer feels awkward, asking friends to do a photoshoot is embarrassing, and your current selfies aren't cutting it.
🎁 Free Download: The Selfie Checklist
Don't miss a step. Get the printable PDF version of this guide + 5 bonus poses.
Good news: you can take excellent dating app photos completely on your own, at home, with nothing but your smartphone. This guide shows you exactly how—step by step, room by room, technique by technique.
No expensive equipment. No professional skills required. Just practical methods that work.
In this guide:
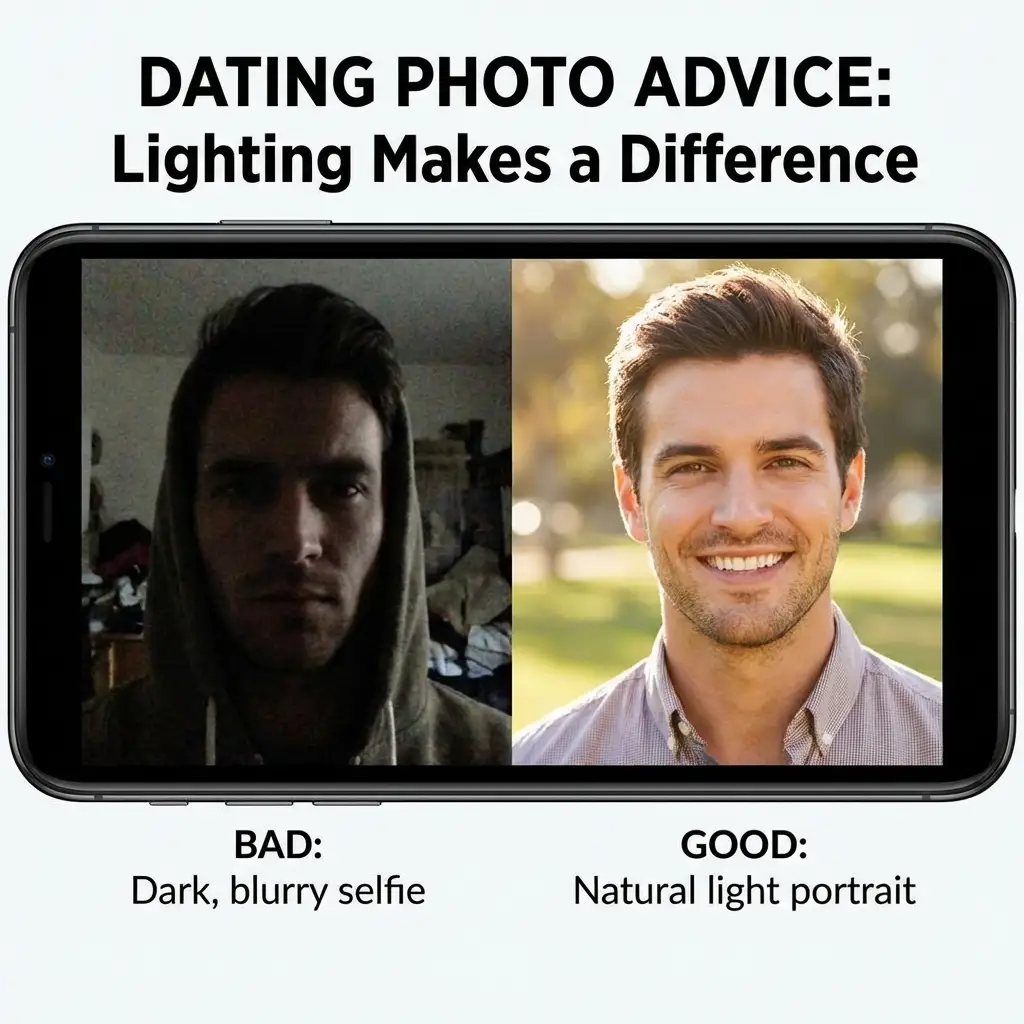
Why DIY Dating Photos Often Look Bad (And How to Fix It)
Before diving into techniques, understand why most self-taken photos fail. It's rarely about attractiveness—it's about execution.
Common mistakes:
- Bathroom mirror selfies with visible toilets, harsh overhead lighting, and cluttered counters
- Arm-length distortion where faces look warped because the camera is too close
- Bad lighting that creates unflattering shadows or washes out features
- Awkward expressions from the stress of trying to take your own photo
- Messy backgrounds that distract from you
- Low angles that emphasize chins and nostrils
- Flash photography that flattens features and creates harsh shadows
Every single one of these problems is fixable with the techniques below.
Quiz: What's ruining your photos?
Select the issue you notice most in your current selfies:
Essential Equipment (You Probably Already Own)
The Basics
Smartphone with a timer function
Any phone made in the last five years works. Front cameras have improved dramatically—even budget phones take decent photos now.
Something to prop your phone against
Books, mugs, boxes, water bottles—anything stable. You don't need a tripod, though a cheap $15 phone tripod from Amazon makes things easier.
A window
Natural light is your best friend. One decent window can transform your photos.
Nice to Have (But Not Necessary)
Phone tripod with remote ($15-30)
Makes the process much faster and lets you take photos from better angles without running back and forth.
Ring light ($20-40)
Useful for evening shoots or rooms with poor natural light. Not essential if you have good windows.
Bluetooth remote shutter ($5-10)
Often included with tripods. Lets you trigger photos without using the timer.
Full-length mirror (that's clean)
For outfit checks and certain types of shots.
Lighting: The Single Most Important Factor
Lighting determines 80% of whether a photo looks good. Master this section and you're most of the way there.
The Window Light Setup
This is the simplest, most effective lighting for home photos.
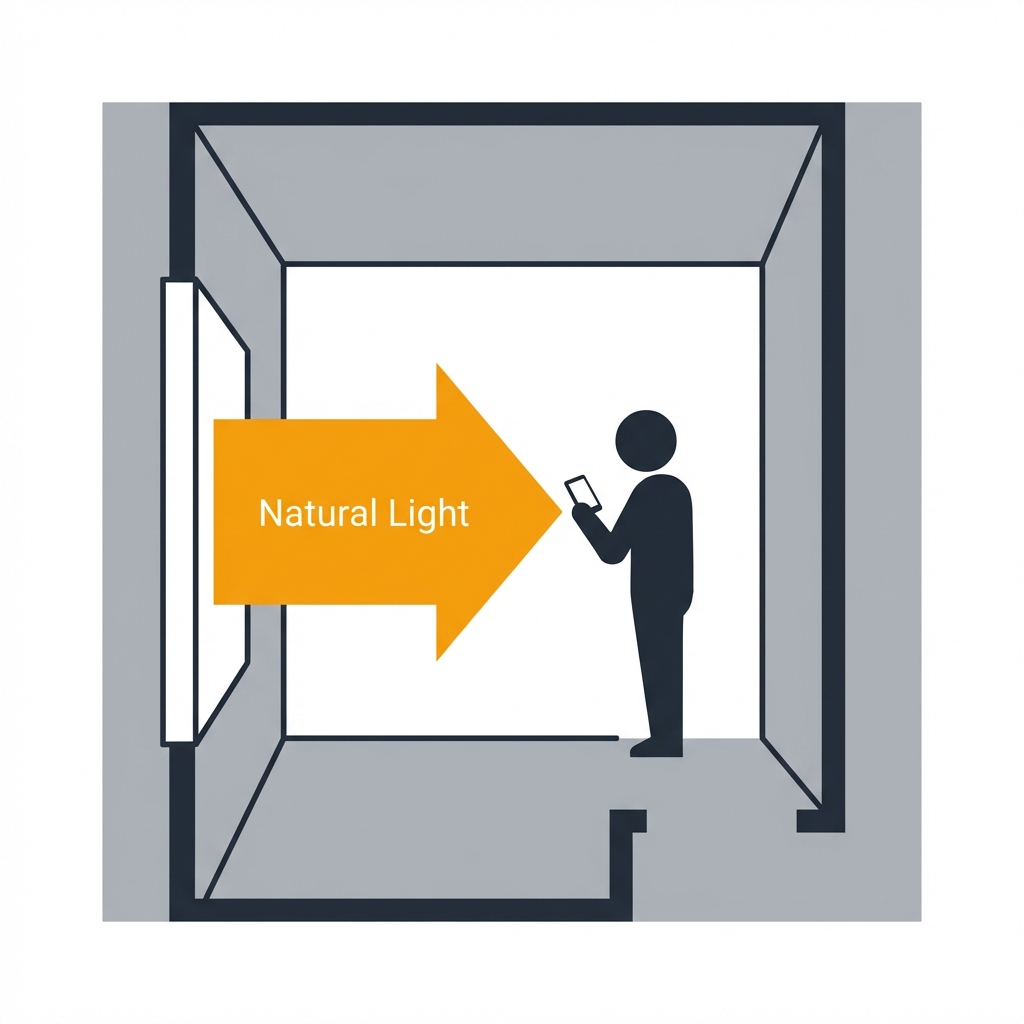
The setup:
- Find a window with indirect light (not direct sunlight streaming in)
- Position yourself facing the window, about 2-4 feet away
- Place your phone/camera between you and the window, slightly above eye level
Why it works: Window light is soft and directional. It illuminates your face evenly while creating subtle shadows that add dimension.
The Overcast Day Advantage
Cloudy days are photography gold. The clouds diffuse sunlight into soft, even illumination that's flattering from any angle. If you have flexibility on when to shoot, pick an overcast day and use a window or even step outside.
Indoor Lighting When Windows Aren't Enough
Sometimes natural light isn't available or sufficient. Here's how to work with artificial light:
- Turn off overhead lights. Ceiling lights create shadows under your eyes, nose, and chin.
- Use lamps at face level. Position a lamp slightly above eye level and in front of you. Diffuse harsh bulbs with a white sheet or pillowcase.
- Ring lights work. Position the ring light directly in front of your face with your phone in the center hole.
- Match your bulb colors. Don't mix warm (yellow) and cool (blue) light sources.
Golden Hour: Nature's Filter
The hour after sunrise and before sunset produces warm, soft, directional light that's universally flattering. If you can shoot near a window during golden hour, the quality of light will be noticeably better than midday.
Camera Positioning and Angles
Where you place the camera relative to your face dramatically changes how you look in photos.
The Ideal Height
Slightly above eye level is the most universally flattering camera position. This angle makes eyes appear larger, defines the jawline, minimizes fullness under the chin, and creates a natural look.
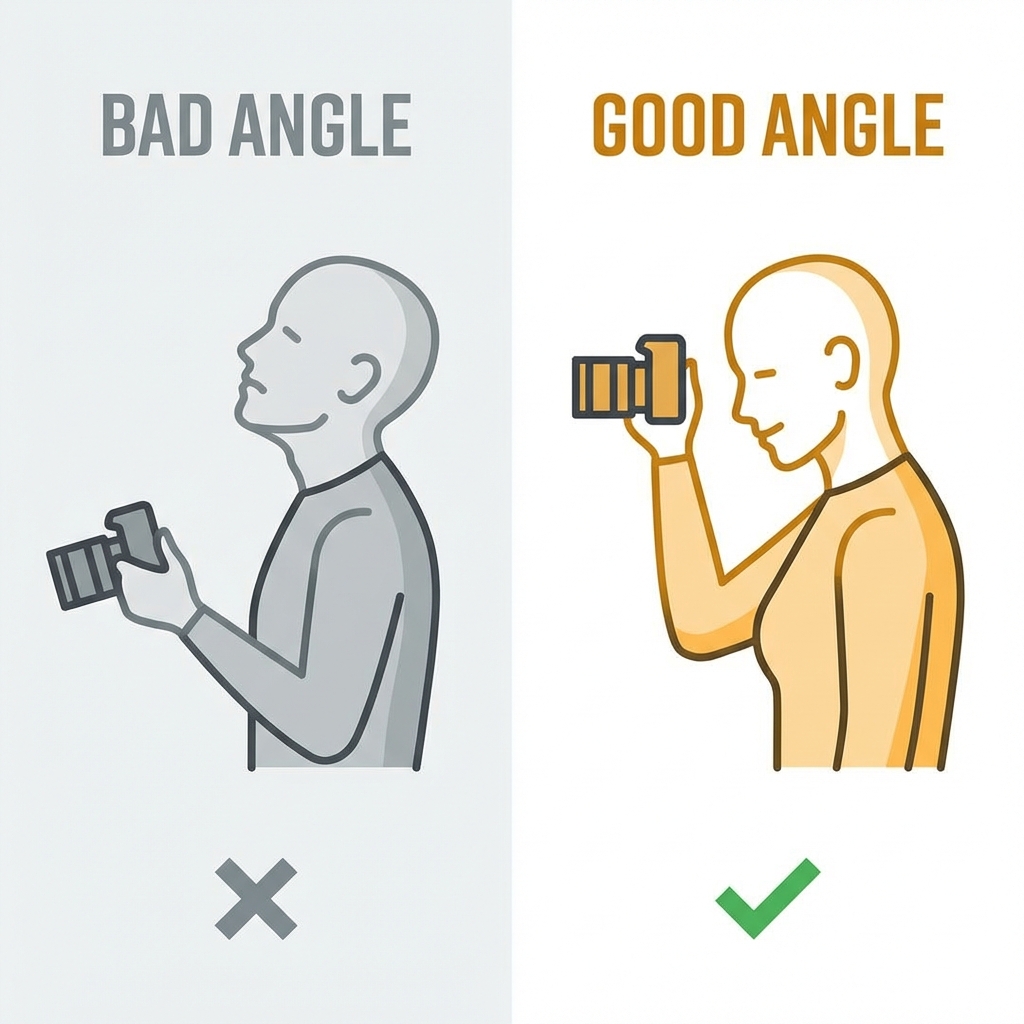
How to achieve it: Stack books, boxes, or use a shelf that puts your phone 4-6 inches above your eye level when you're in position.
Distance Matters
Too close = distortion. When a camera is very close to your face (standard selfie distance), wide-angle lenses distort features. Noses look bigger, faces look rounder.
The fix: more distance. Position your phone 4-8 feet away and use the timer or a remote. This distance produces more accurate, flattering proportions.
Angles for Your Face
- Three-quarter turn: Don't face the camera straight on. Turn your face about 30 degrees to one side.
- Chin position: Push your chin slightly forward and down to define your jawline.
- Find your side: Take identical photos from your left and right to determine which you prefer.
Setting Up Your Shot: Room by Room
Living Room
Pros: Usually has the best natural light, more space to work with, neutral backgrounds.
Setup: Position yourself near the largest window. Use a couch, bookshelf, or blank wall as background. Clear clutter.
Bedroom
Pros: Good window light, personal feel.
Cautions: Unmade beds and messy rooms read as lazy. Make your bed or frame the shot to exclude it.
Kitchen
Pros: Good light, can show lifestyle (cooking, coffee).
Setup: Clean surfaces thoroughly. Consider action shots like making coffee.
Bathroom
Generally avoid for dating photos. Bathroom selfies are cliché and rarely flattering. If you must, ensure the toilet isn't visible, counters are clear, and you use natural light (not overhead).
Outdoor Spaces (Balcony, Patio, Yard)
Pros: Natural light, interesting backgrounds.
Setup: Shoot during golden hour or overcast days. Ensure sun is in front or to the side, not behind you.
The Timer Method: Step-by-Step
Setup Phase
- Choose your location based on lighting (window light is priority)
- Clear the background of anything distracting
- Set up your phone on a stable surface slightly above eye level
- Mark your position with a small object on the floor
- Check the frame with a test shot
Camera Settings
- Timer duration: 10 seconds
- Burst mode: Combine with timer if possible
- Resolution: Highest available
- HDR: On
- Portrait mode: Use for blurred backgrounds
The Shooting Process
- Start the timer
- Walk to your mark
- Get into position
- Take a breath and relax your face
- Look at the lens (not the screen)
Not sure if your photos are good enough?
Get unbiased feedback from real people on WouldSwipe before you upload.
Test My PhotosExpressions That Work
The Problem with "Smile!"
When you consciously try to smile, you typically engage only your mouth muscles, creating a forced, unnatural expression. Genuine smiles involve the eyes.
How to Get Natural Expressions
- Think, don't pose. Think of a funny memory or someone you love.
- The laugh trick: Force a laugh just before the photo; it often turns into a real smile.
- Music helps. Play music to relax.
- Talk to yourself. Conversational phrases relax facial muscles.
The "Squinch"
Slightly narrowing your lower eyelids—a "squinch"—creates a confident, engaging expression. It avoids the "deer in headlights" look of wide-open eyes.
Posing Yourself: Body Language Basics
Standing Poses
- Don't square up. Angle your body 30-45 degrees.
- Shift your weight. Put weight on your back foot.
- Create space. Keep arms slightly away from body.
- Hand placement: One hand in pocket, holding something, or relaxed at sides.
Seated Poses
- Don't sink in. Sit on the edge of the chair.
- Angle your legs. Angle legs to the side.
- Lean forward. Suggests engagement and interest.
What to Wear
Colors That Photograph Well
Best choices: Deep, saturated colors (navy, burgundy), earth tones (olive, rust), classic neutrals (charcoal, cream).
Use caution with: Bright white, pure black, fluorescents, and colors matching your skin tone.
Patterns & Fit
Avoid tight, small patterns that create visual noise. Ensure clothes fit well—baggy clothes look sloppy, tight clothes look uncomfortable.
Creating a Complete Profile Photo Set
Ideally, you want 4-6 photos showing different aspects of you. if you need inspiration, check out our guide on the Best Tinder Photos for Guys.
- Photo 1: The Clear Face Shot. Good lighting, genuine smile, simple background.
- Photo 2: The Full or 3/4 Body Shot. Shows style and posture.
- Photo 3: The Activity/Interest Shot. You doing something you enjoy.
- Photo 4: The Social Shot. Can be substituted with another lifestyle shot if solo.
- Photo 5: The Personality Wildcard. Humor, pet, or unique hobby.
What to Avoid
- Multiple photos in the same outfit/location
- All selfies
- All photos from the same angle
- Group photos where you're hard to identify
- Photos more than 2 years old
Editing: Enhancement Without Deception
Editing should enhance, not deceive.
Acceptable: Exposure/brightness, contrast, cropping, color correction, temporary blemish removal.
Avoid: Face reshaping, heavy skin smoothing, body reshaping, filters that alter appearance, fake teeth whitening.
The test: Would someone meeting you in person feel misled? If yes, you've edited too much.
Quick-Start Checklist
Ready to shoot? Run through this checklist:
- ☐ Setup: Window light, clear background, phone stable at eye level.
- ☐ You: Outfit wrinkle-free, grooming checked.
- ☐ During: Overhead lights off, taking 50+ photos, varying expressions.
- ☐ After: Select best 10-15, subtle edits, verify they look like you.
Final Thoughts
Great dating photos aren't about being naturally photogenic or having professional equipment. They're about understanding light, angles, and expression—then practicing until you find what works for you.
Take your time. Experiment with different setups. Take hundreds of photos if needed. The few great ones you end up with will be worth the effort.
Now go find that window light and start shooting. (And once the matches start rolling in, confidentially slide into their DMs with our First Message Examples).
About the Author
The WouldSwipe Team analyzes thousands of dating profiles to determine what actually gets matches. We combine data with psychology to help you date better.